

Hiya everybody. Hopefully you stuck with me after reading Backyard Beginner Beekeeper, Part 1 to find out how you really actually shake bees into a new hive!
But before I get to the exciting action, I thought I would talk a little bit about getting started.
Bee Prepared
![]() As a first step, I started in January taking a monthly beekeeping class. Most classes start near the beginning of the year to get you ready to get your bees in April/May. The one I went to is the Montgomery County Beekeepers Association of PA beginning beekeeping class held in the 4-H building classrooms. I was shocked at my first class (thinking there might be 5 or 10 people there) to find the class was close to 100 people!
As a first step, I started in January taking a monthly beekeeping class. Most classes start near the beginning of the year to get you ready to get your bees in April/May. The one I went to is the Montgomery County Beekeepers Association of PA beginning beekeeping class held in the 4-H building classrooms. I was shocked at my first class (thinking there might be 5 or 10 people there) to find the class was close to 100 people!
 Beginner beekeeper classes are extremely valuable, providing just the information you need in stages to gather equipment and knowledge in preparation for your hive and to then learn how to keep your hive healthy.
The class is really a one-stop shop for learning the basics, understanding the science of beekeeping, how to find good sources of information and equipment, getting access to experts and long-timers, creating camaraderie with fellow newbies, and staying connected to the State association to keep up on what's relevant to your region.
Bee Ready to Do Homework

The class work is supplemented by a lot of background reading because there is a lot to learn about bee biology, basic equipment, pest management, and how to check your hives.
 The book on the right is the course book for the class I'm taking while the book on the left is an additional one I've found helpful with some better photos. In addition to these books, I've found too many websites and videos to count - lots of good information out there and it was helpful to see techniques in action before I did some myself. I particularly like the videos that The Fat Bee Man (yes, that is what he calls himself!) puts on his You Tube channel.
Bee Equipped
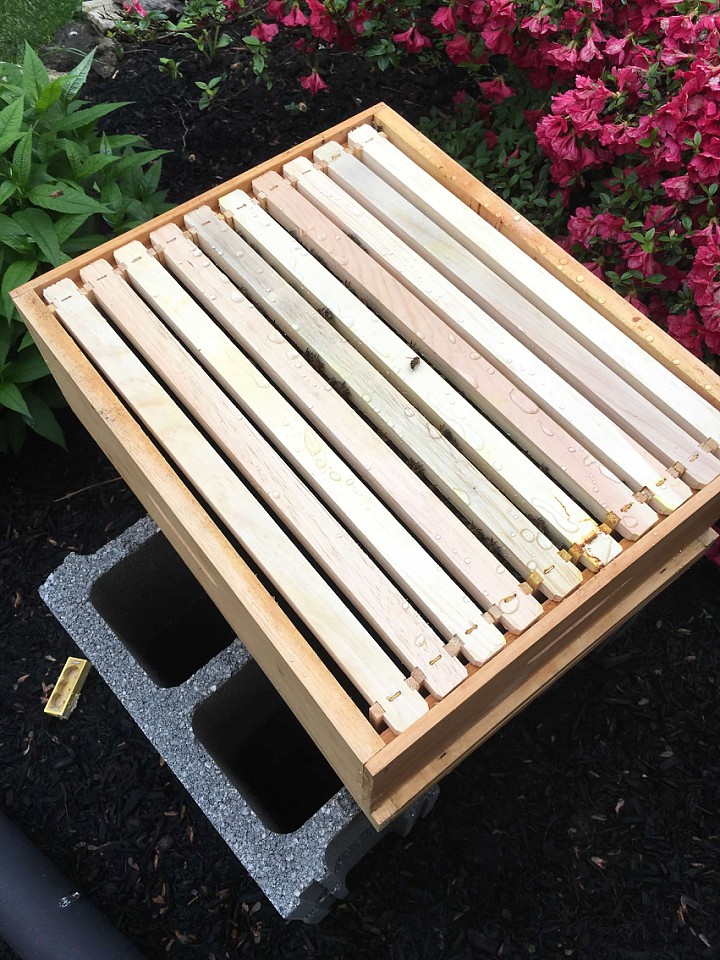
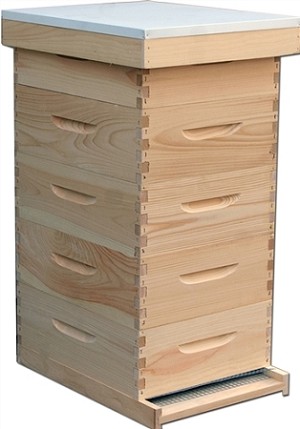 The next thing to do was to obtain hives, tools, and proper clothing. And then order the bees. The instructors for class have a nice side business of helping newbies get started so I was able to purchase 2 full wooden hive sets and some miscellaneous supplies from them. I chose a set with 5 medium hive boxes. The boxes do not have a top or bottom so they are really not a 'box' - the frames just hang inside on an inner ledge.
 Traditional hives have 1 or 2 boxes on the bottom - these are called brood boxes and are where the queen and baby bees live. These boxes can be ‘deeps’ (large size) or ‘mediums’ (smaller size). Whatever boxes go on top of the brood box are called ‘supers’ - this is where bees store honey. I like the versatility of having them all the same size. And since the supers on top will be the ones holding the honey, it will be important to be able to lift them once they are honey laden.
Everything else like jackets, hats, smokers, and tools could be obtained from Amazon or from local suppliers. The class also had connections to someone who did wax dipping so instead of having to paint my hives to weatherproof them, I was able to have them dipped in hot wax to seal the wood for about $50. I like the look of the natural wood so this was a nice option and will help the hives last for years.
 There were several options for ordering bees. The class instructors had nucs for sale. A nuc is just a small colony that is already started - basically a box with a queen and a colony that's already filled the frames. Typically these nucs have already survived the winter so some people chose to start with this higher guarantee, but they are more expensive.
The most common way to start is to just order a 'package' of bees. These are bees in a screened shipping box that you can order around the first of the year and they become available in the Spring (April/May) for installation into a hive. You can choose between types of bees (Italian probably the most common) and whether you want your queen marked for easier identification (good for starters like me).
Bee Brave
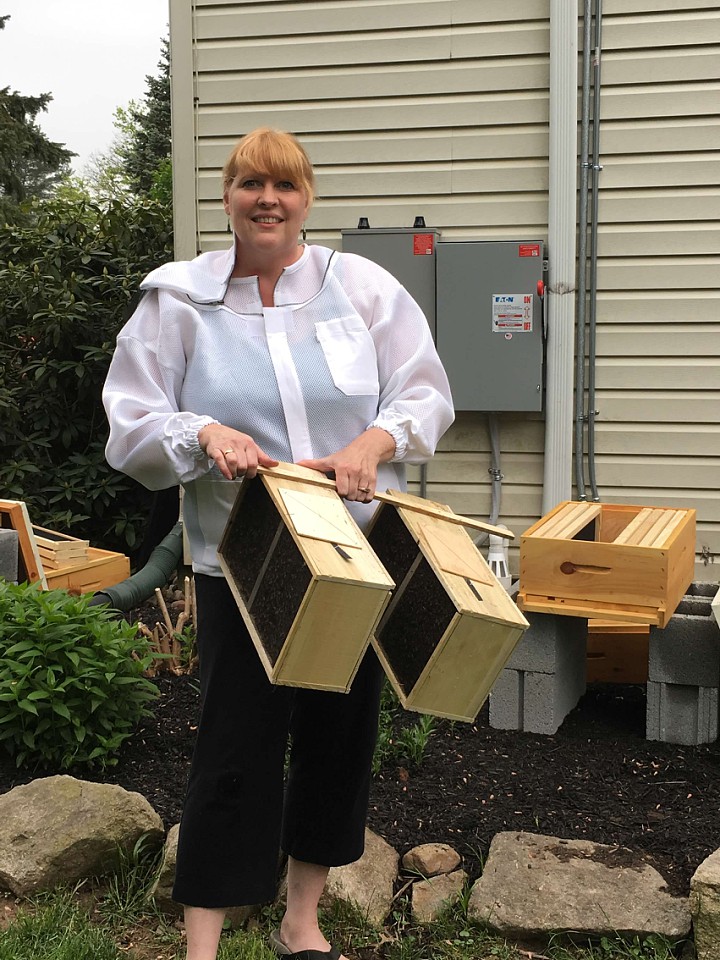
So here it is.....the moment of action! After bringing my 2 boxes of bees home in the back of my car (which is a totally weird experience as there is just a constant low buzz as you drive), I was ready to put them in the new hives.
First I needed to make some sugar water (1:1 mixture) as you use it to spray the box of bees to keep them from flying around and keep them busy licking it all off.
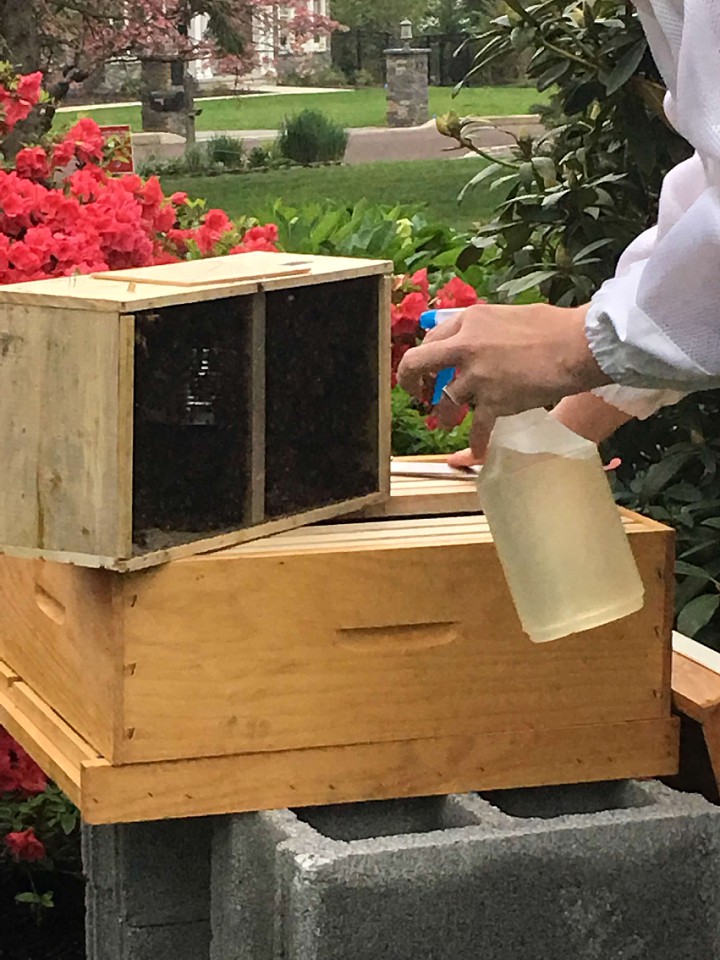
Then time to gear up and get ready to install my first box! After spraying the bees with the sugar water, I pried open the wooden cover on the top. Inside there is a metal can containing sugar water that has been their source of food while they were in transit. This has to be removed by prying it out.
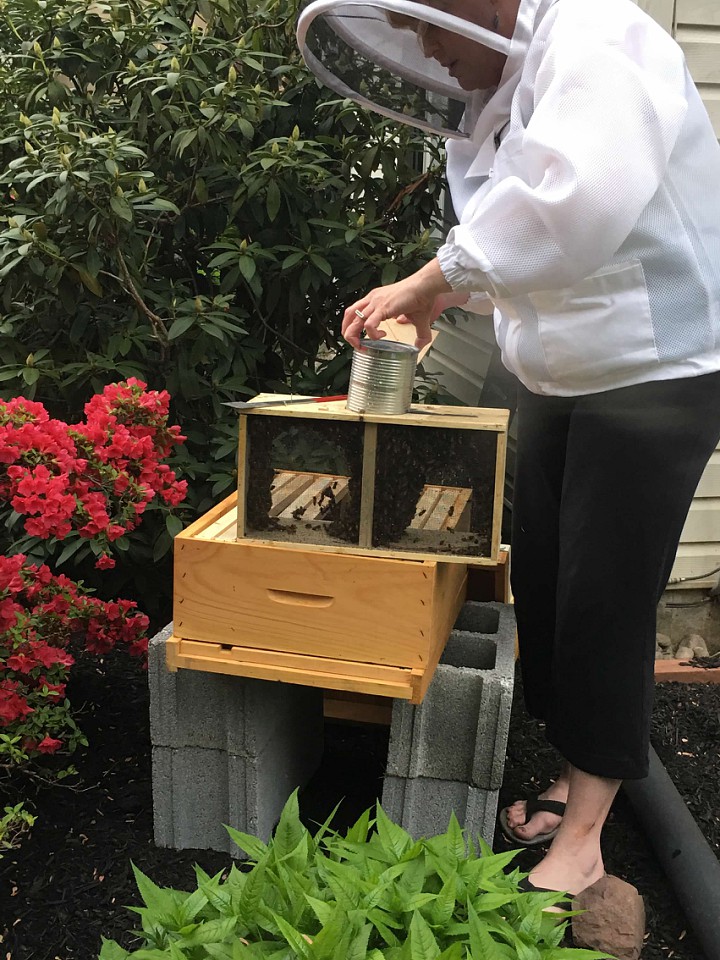 Also inside the box is a caged queen, kept protected from the bees as they are put together just days before shipping or transport and they have not yet had time to accept her.
 So once the metal can of sugar water was out, the bees could generally fly out of the hole but only a few did as most were too wet. I used the little wood slab I took off to just cover the hole while I put the can aside and got ready to pull out the queen.
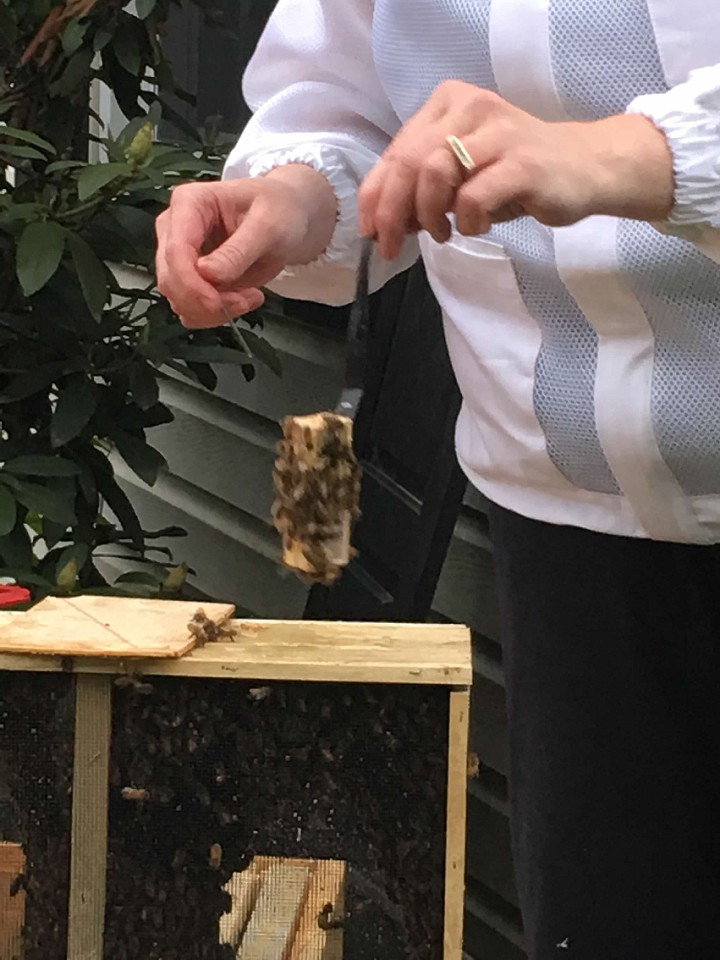 The caged queen is in a small screened wooden box with a plastic strip attached. At one end of the box, there is candy (fondant) in a little block and that end of the box has a little hole with a cork in it. You remove the cork and this allows the bees to eat through the candy to free the queen. By the time they have eaten through the candy (~3 to 4 days), they have generally accepted her. So after inspecting to make sure the queen was alive and well, I set the little box to the side until the rest of the bees were installed. Once they were in, the little box she was in would get attached to one of the frames in the hive with a thumbtack. Once she was freed from the little box in 3 or 4 days, I could remove it from the hive.
The next step was to remove some of the frames from the middle of the hive to just make room for the bees I would shake in. There are about 3,500 to 4,000 bees in each box! Time to shake!
 Did you see the stylish dab at the end? Too funny.
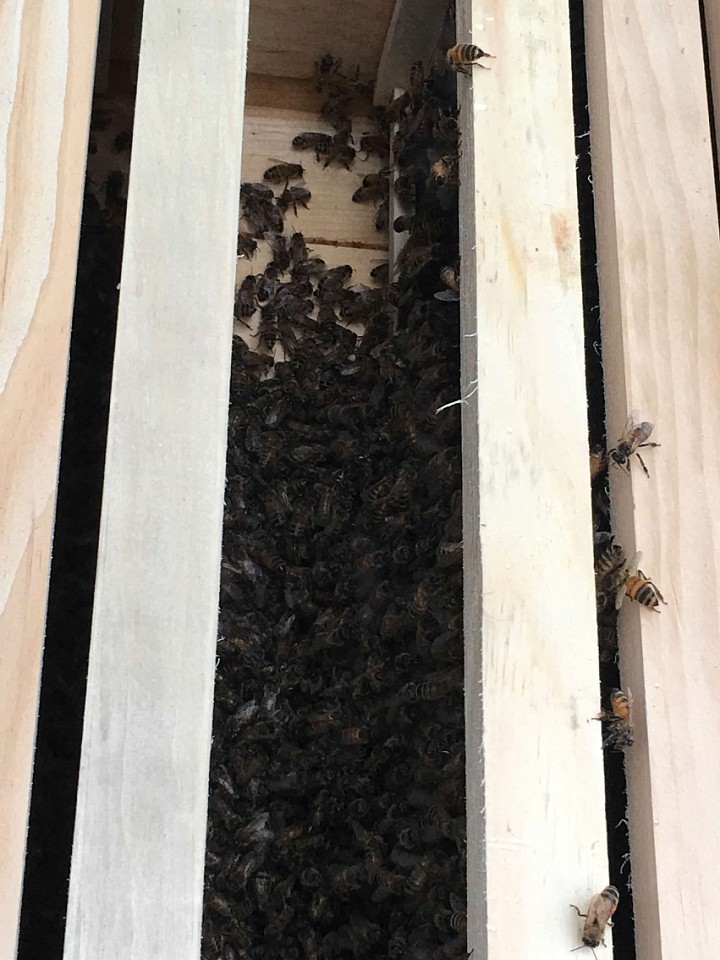
And they're in! And still a little drunk on all that sugar.....a few flying around and a few left in the box that will find their way in soon enough.
 I gently put the missing frames into the box, allowing bees to get out of the way as they slid in. And that was really it - a loaded hive! (The hardest part honestly was getting the metal can out of the box as it is set level with the top of the box.)
On top of the hive box I just filled, I placed an inner cover which is just a thin flat piece of wood with a hole in the center. On top of that I could place the metal can of sugar water that was still pretty full and an empty super. The outer cover goes on top of that and this will be the hive structure until they fill in the frames of the first box. Over the next days to months, it will be helpful to keep sugar water available to them as they build up the colony - they'll need the extra assistance to get all their work done.
So the whole process was just repeated once more for Box 2. It all took less than an hour and was surprisingly less stressful than I thought it was going to be.
Bee Curious
 So currently, I'm about 2 weeks out from installation and checking on the hives every 4 days or so, just to learn and see what they're doing. It was amazing to see how fast they created the wax hexagon structures on several frames in just a few days.
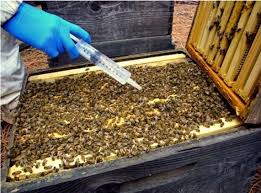
 I definitely wanted to see if I could identify the queen and make sure she was healthy. (In the picture on the right, you can see her toward the bottom of the wood frame (middle of the photo), with the longer bottom and red dot on her head. I was relieved to find her healthy and happy in each of the hives.
A good start.
Bee Healthy
 So my goal at the moment is to have a healthy hive that survives Winter. Honey will be a bonus if it happens before then and is probably more likely next year. After the bees fill out the frames in the first box, I'll add another box. And once they fill that, I can put what is called a 'queen excluder' on, which is essentially a screen that allows the worker bees to go thru but keeps the others down in the lower boxes. The upper boxes will then just contain honey (and no baby bees!).
 The other major issue for beekeeping is to protect the bees from varroa mites. The mites are a major reason for declining bee populations today. These parasites were introduced into the U.S. in the late 80's and have spread across the country.
Some of the bee instructors actually joke that you are now more of a 'mite fighter' than a 'bee keeper' these days. So currently the treatment is to dribble a solution of oxalic acid (wood bleach) across the frames periodically. This kills the mites but does not harm the bees or affect the honey.
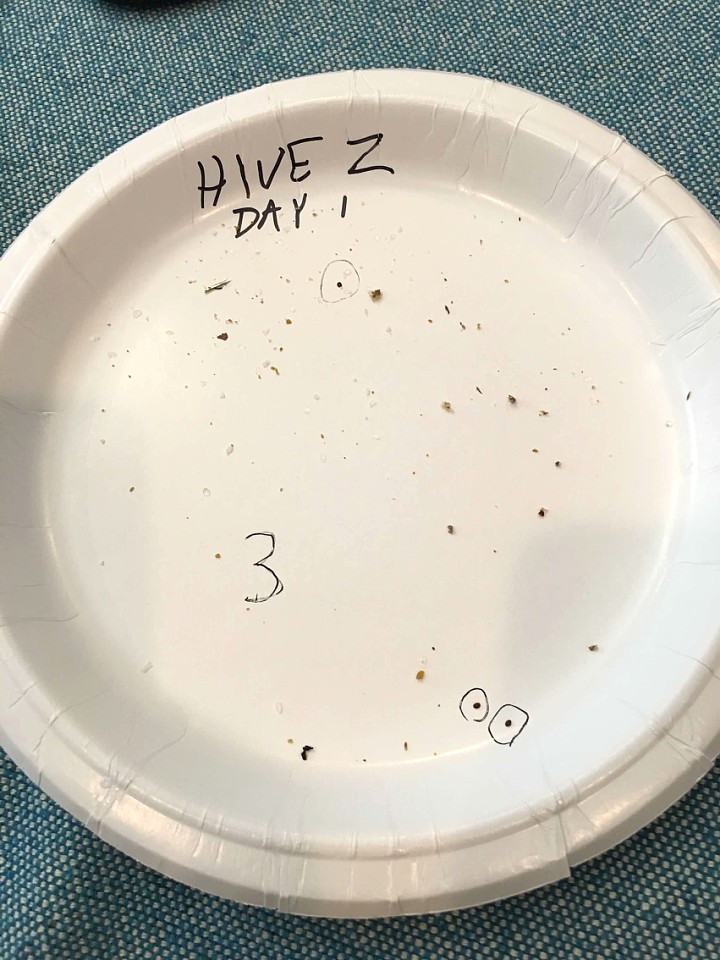 Our instructor is actually conducting a study to see how many mites are present in bee packages on average. He is enlisting the class to collect data for him as part of this. So for 10 days following an oxalic acid treatment, I'm counting and circling mites on paper plates containing all the debris that falls to the bottom of each hive! Our data will be included in his study publication which will be pretty cool. Not every day you can say your data is part of Scientific Beekeeping or something similar.
Bee Positive
I've heard it's not so easy to keep bees in this area so I'm a little nervous. But I'm staying positive, with a determination to keep them healthy. At the very least, I will learn a lot and gain an appreciation for the backyard biology lesson. I'm hoping I can be one of the lucky ones who will have strong hives that survive.
 I do want to thank my film crew for helping me with the photos and videos on this post (my son Daniel and daughter Annalise). They took so many great pictures and manned the video. I couldn't have done it without them (although they did get up to strange things with my phone while I was occupied with set up. Exhibit A to the left).
They have been excited to come watch Mom in action with the hives, and I'm thrilled they're not too scared to see for themselves. We'll see if I can get my other 2 kids out here as well. It will be fun to do some of this together as they get older and I get enough experience to teach a few things.
Welcome to my new adventure! Stay tuned!